You use Shopify for your Music store? With Shopify Webhooks you can execute code when a specific event occurs on your shop. For example, you can fire a notification when an item is added to a shopping cart, or when a new customer enters its details. The goal is to have custom notifications, without having to pay for an App like 'Order Trigger'.
For this you need to register an HTTP endpoint in the Shopify Settings - Notifications - Webhooks page. But wait, you do not have a web server where to host the webhook? That's not a problem if you have an AWS account, that's the magic of Serverless architectures!
The AWS cost for running this Serverless notifications system is very low compared to other available solutions. For 10000 notifications processed and 10000 emails sent, it will cost you only one dollar! With 'Order Trigger' you would get only 2000 emails per month for $100, and 'Zapier' would require the $299/month plan.
In our example we will use AWS Lambda and the Serverless framework to quickly setup custom email notifications with Amazon SES.
I assume in this quick guide that:
- you are familiar with Amazon AWS, and that you have setup your account
- you know the basics of the Python programming language
- you have setup a mail domain in Amazon SES
Getting started with Serverless and Amazon
First install the Serverless Framework with NPM.
npm install -g serverless
You should be able to run sls commands and create a basic project. Run this in a new directory to get the basic sls project file:
sls create -t aws-python3
Now you just have to modify 2 files, serverless.yml and handler.py to setup a simple Lambda based webhook for Shopify.
Please create a specific IAM user for Serverless, do not use a full admin user. In serverless.yml, you define the functions that will be linked to our webhook. For Shopify we will use an HTTP 'POST' as you can see below:
serverless.yml:
service: shopify-atc-notification

provider:
  name: aws
  runtime: python3.7
  region: 'us-east-1'
  iamRoleStatements:
    - Effect: Allow
      Action:
        - ses:SendEmail
        - ses:SendRawEmail
      Resource: "*"
  memorySize: 128

functions:
  atc:
    handler: handler.atc
    events:
      - http:
          path: shopify/atc
          method: post
          integration: lambda
So each time we do a POST to https://someurl/dev/shopify/atc, it will run the atc() function in handler.py.
The code below will simply send an email with Amazon SES, with 'Add To Cart' as subject, with the source and destinations addresses defined at the start. Of course you should check that the email domains are allowed in your SES configuration.
All the details of the Add to Cart event, will be in the 'data' variable. You can read the Shopify webhook reference documentation here. In our example, we can access the SKU of the 1st item put in the Cart with the variable data['line_items'][0]['sku'].
handler.py:
import json
import boto3
import os

source = "me@myshop.com"
destination = "admin@myshop.com"

def atc(event, context):
    data = event['body']
    subject = "Add To Cart"

    client = boto3.client('ses')
    response = client.send_email(
        Destination={ 'ToAddresses': [destination] },
        Message={
            'Body': {
                'Text': {
                    'Charset': 'UTF-8',
                    'Data': "data= "+str(data),
                },
            },
            'Subject': {
                'Charset': 'UTF-8',
                'Data': subject,
            },
        },
        Source=source
    )
    return "ok"
Serveless deployment to AWS Lambda
Now I invite you to modify these two files to fit your needs, and run sls deploy when you are ready to test:
sls deploy
Serverless: Packaging service...
Serverless: Excluding development dependencies...
Serverless: Creating Stack...
Serverless: Checking Stack create progress...
.....
Serverless: Stack create finished...
Serverless: Uploading CloudFormation file to S3...
Serverless: Uploading artifacts...
Serverless: Uploading service shopify-atc-notification.zip file to S3 (516 B)...
Serverless: Validating template...
Serverless: Updating Stack...
Serverless: Checking Stack update progress...
..................................
Serverless: Stack update finished...
Service Information
service: shopify-atc-notification
stage: dev
region: us-east-1
stack: shopify-atc-notification-dev
resources: 11
api keys:
  None
endpoints:
  POST - https://abc123.execute-api.us-east-1.amazonaws.com/dev/shopify/atc
functions:
  atc: shopify-atc-notification-dev-atc
layers:
  None
After a few seconds, your webhook should be deployed and the POST URL(s) will be displayed below to 'endpoints' line. This is the URL that you should put in your Shopify console.
-
Go to Shopify Settings - Notifications - Webhooks page:
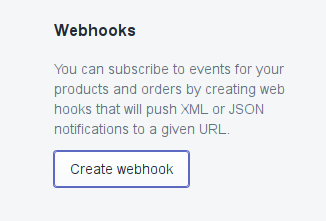
-
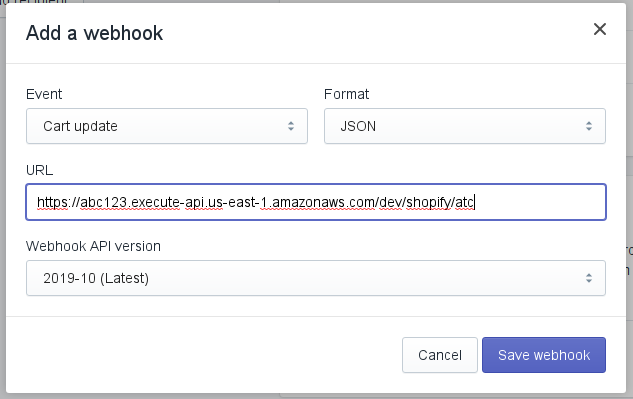
And Click on Add Webhook, put the URL given above:
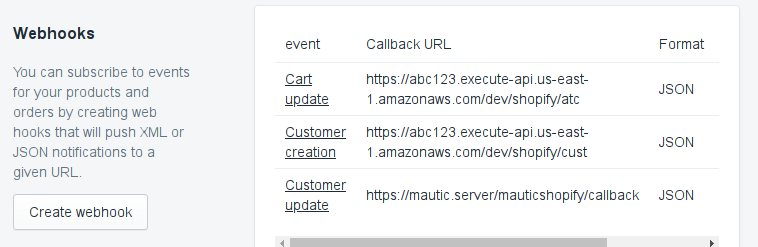
After a Serveless deployment you can run sls info to get a summary of the webhooks deployed to Amazon AWS. In the screenshot below, you see that I have added webhook for cart update, new customers, and customers update:
If you're curious about the last webhook, it goes to Mautic, a great Marketing Automation platform that I like to use with Shopify, and that I'll cover in next blog posts.
Now you have all the keys to set-up your own notifications system on Shopify, and start automating your music shop a little more :)
You can contact me if you need cloud expertise regarding your music business, especially in the Grand-Est, Moselle and Luxembourg area.


Speak your mind: