Did you purchase a small OLED screen on AliExpress and are struggling to get it working on your Raspberry Pi? I hope to steer you in the right direction with this handy guide.
I'd already had a bit of fun with a 128x32 OLED display and one of the many Python libraries for SSD1306, the classic controller for this type of OLED display. When I switched to a larger 128x64 model, I thought everything would work just as easily. I was wrong, the libraries for SSD1306 no longer worked...
This is the type of screen I'm talking about:
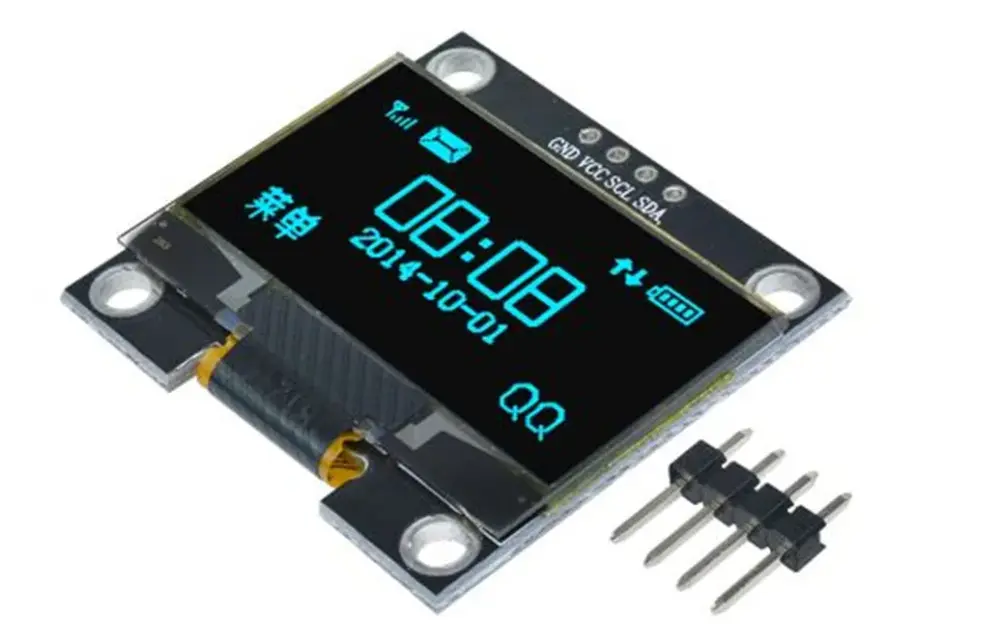
Fortunately, I've found a way out thanks to Circuit Python on the Raspberry PI. Circuit Python has many drivers and I was able to try out a few until I found the right one! In fact, this screen was equipped with an SH1106 controller.
Connecting your Display to the Raspberry
Here are the connections I've chosen, from the OLED header to the Raspberry PI 3/4/5 bus:
- pin 1 GND => pin 6
- pin 2 VCC => pin 1
- pin 3 SCK => pin 5
- pin 4 SDA => pin 3
Now for the software.
OLED displays with Circuit Python / Blinka
First of all, make sure you've enabled the I2C bus on your Raspberry PI.
$ raspi-config
  => Interface options
   => I2C enable
Then, if you haven't already installed Circuit Python for your Raspberry, Adafruit Blinka, follow the set up of the CircuitPython 'venv' here.
In your Circuit Python Venv, install the Displayio library, the SH1106 module, and what is needed to display text:
$ pip3 install adafruit-blinka-displayio==1.2.2
$ pip3 install adafruit-circuitpython-displayio-sh1106
$ pip3 install adafruit-circuitpython-display-text
You'll notice that I'm forcing the installation of DisplayIO/Blinka version 1.2.2 because version 2.x is not properly documented for implementing I2C bus displays. The complete DisplayIO documentation can be found here
With version 1.2.2, initialization of an I2C display is as follows:
import busio
import displayio
import terminalio
import board
from adafruit_display_text import label
import adafruit_displayio_sh1106
import time

displayio.release_displays()
display_bus = displayio.I2CDisplay(board.I2C(), device_address=0x3C)

WIDTH = 128
HEIGHT = 64
display = adafruit_displayio_sh1106.SH1106(display_bus, width=WIDTH, height=HEIGHT)
By adding the following lines, you'll have a beautiful "Hello World!" greeting ready to dazzle. 😁
BORDER = 5

# Make the display context
splash = displayio.Group()
display.root_group = splash

color_bitmap = displayio.Bitmap(WIDTH, HEIGHT, 1)
color_palette = displayio.Palette(1)
color_palette[0] = 0xFFFFFF  # White

bg_sprite = displayio.TileGrid(color_bitmap, pixel_shader=color_palette, x=0, y=0)
splash.append(bg_sprite)

# Draw a smaller inner rectangle
inner_bitmap = displayio.Bitmap(WIDTH - BORDER * 2, HEIGHT - BORDER * 2, 1)
inner_palette = displayio.Palette(1)
inner_palette[0] = 0x000000  # Black
inner_sprite = displayio.TileGrid(
    inner_bitmap, pixel_shader=inner_palette, x=BORDER, y=BORDER
)
time.sleep(1)
splash.append(inner_sprite)

# Draw a label
text = "Hello World!"
text_area = label.Label(
    terminalio.FONT, text=text, color=0xFFFFFF, x=8, y=HEIGHT // 2 - 1
)
splash.append(text_area)

while True:
    pass
If you have information about initializing an I2C display with Blinka DisplayIO v2, please share the info below. Thanks!


Speak your mind: