I have had a few solar panels connected to the grid via micro-inverters for some time. How can I minimize the free reinjection to the grid when there is no commercial solution at a reasonable price? You will find below how I store the solar power surplus produced during the day and reinject it during the night, without modifying my electrical installation, and without powerful and expensive inverter!
It's been a while that I try to make my solar panels as profitable as possible, and to reinject power at night too, but when using micro-inverters, there is no commercial solution ready to use, not even at Victron... So I had to imagine a "hybrid" and open-source re-injection solution.
Without a solar storage system, I currently have a rate of self-consumption around 70% which is very good, and my installation will be profitable in less than 10 years, but I want to go to the end of this project to know if recovering the remaining 30% is economically viable.
Here is the general diagram that illustrates my idea:
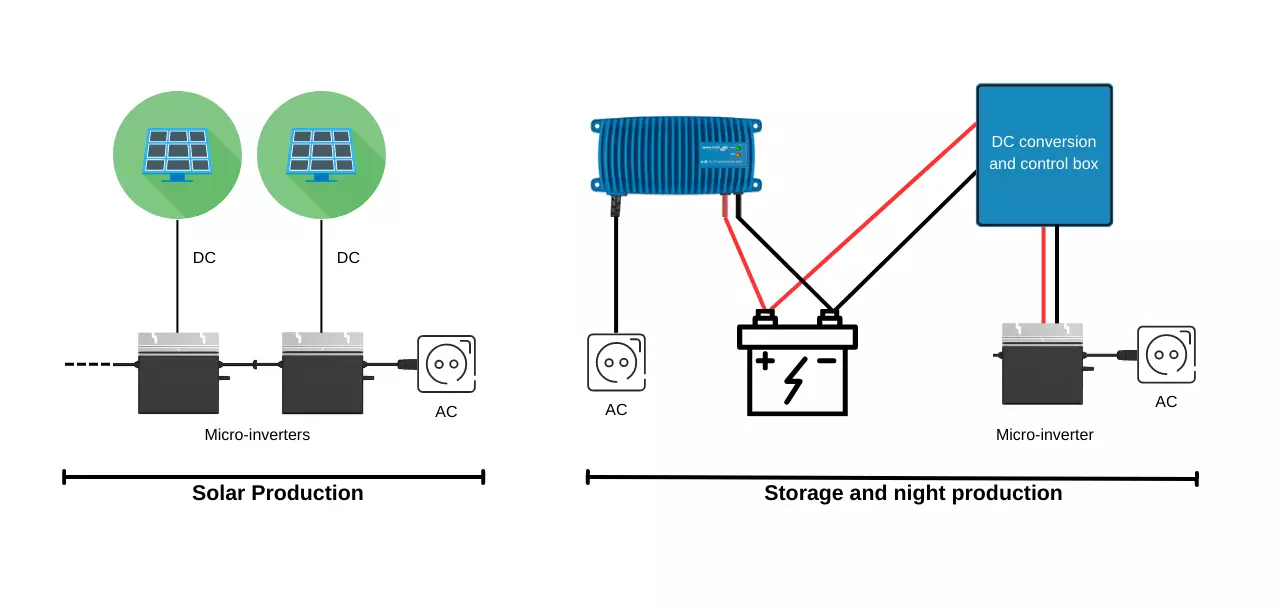
On the left the solar production part, via micro-inverters connected directly to the grid. I use Hoymiles micro-inverters for several very good reasons that I will develop later. The electricity not consumed by my house is injected into the grid and definitely lost.
On the right, the storage part of the surplus. This part is a bit more complex because we have the following components: battery charger, home automation, DC battery, boost-converter and control unit, one micro-inverter.
Storage of the solar surplus and reinjection
More in detail we have for the right part:
- A battery charger controlled via a plug controlled by a home automation
- A low voltage DC battery storage
- A control box that will raise the DC voltage of the battery to an acceptable level for the micro-inverter, and which will be activated at night
- A Hoymiles micro-inverter connected to the grid that will inject my green energy from the batteries at night
Automated battery charge with my Raspberry PI
By automating a battery charge, this ensures that you don't produce too much energy and oversupply your grid at peak production times.
In the 1st version I simply used a Bluetti EB70S portable battery with ~700Wh capacity, beaucause I had one used for camping.
I think that the ideal is to have at least 2 to 3 times more battery capacity than solar panels, in northern Europe anyway. In my case, my 1kW of solar panels should be supported by a 2 or 3kWh battery. In a sunny area maybe we can double the number. Tell me your opinion in comments! 👇
The EB70 can be charged via a DC8020 connector up to 200W with the supplied power supply. But that's a lot of watts in winter compared to the 1kW of panels and my baseline consumption. I think the ideal is to charge the battery at 70-80Wh/h (in winter). In summer 200W is more appropriate.
So I first opted for this:
- Aliexpress lab power supply with current limiting set to 28v and 2.5A.
- Zwave controlled socket on which the power supply is plugged
- Domoticz, running on a Rasberry PI3, will activate the outlet and the battery charge when the solar production exceeds a certain level
Domoticz also monitors the electricity consumption of my house thanks to a custom WiFi meter.
This system was working quite well, but the power supply efficiency was deplorable, around 70%, and in solar autonomy every watt counts!
So I started to search on Aliexpress, a power supply with a better efficiency and a current regulation. I did not find anything convincing. Finally I found my happiness with a Charger Victron Blue Smart IP67.
This battery charger is not very expensive compared to its outstanding characteristics:
- 93% efficiency or more
- Can charge any battery (Pb, LiFePo4) or operate in constant current supply
- Compatible with 24v or 12v
- Different amperages available from 5A to 25A.
- max current can be switched between 2 values via Bluetooth
- Adjustable output voltage via Bluetooth (12.8v - 15v in advanced mode)
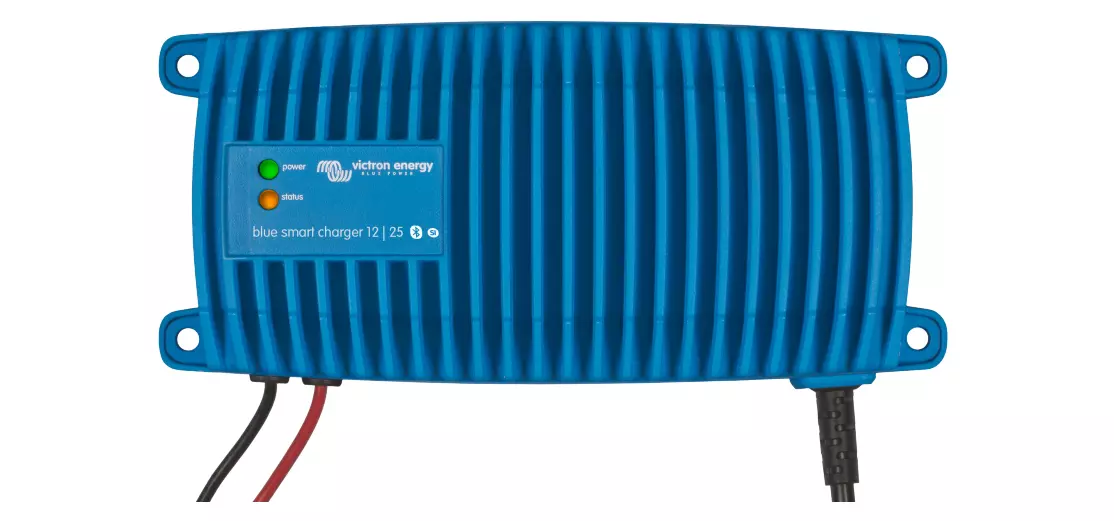
The quality of this charger is exceptional, and it really feels like this thing can't catch fire, unlike an Aliexpress power supply 😁. I opted for a 12v 6A/17A model, which will allow me to charge in 70W or 200W if needed. And later I'll be able to directly charge a LiFePO4 battery with it.
It is surely possible to control the charger from Domoticz via bluetooth, I have some scripts to validate...
The Zwave plug returns the current consumed by the charger so I know via Domoticz when the battery is full.
Bigger battery storage
700Wh of battery is a little bit too much for 1000Wp of solar panels. The 2nd part of my project is to buy a 1200Wh LiFePO4 battery. This battery will also be charged via the Victron Blue Smart charger, and if this battery is full, then the energy will be sent to the Bluetti EB70. This will give me almost 2000Wh of storage.
I will simply need a constant current power supply, controlled by something like EspEasy with a relay or Mosfet switch.
More on this later in a 2nd article...
Advantages of PV micro-inverters
Why did I choose Hoymiles micro-inverters instead of a big central PV inverter?
- Greater system flexibility: flexibility in the design and installation of a solar PV system. They can be used in systems of different sizes and configurations, and can be easily added or replaced if needed. I started with one solar panel, now I have 3, and may add more later (if I confirm that they could be profitable)
- Increased energy production: Microinverters are designed to optimize the performance of each individual solar panel in a solar PV system. Great if you have a few trees around that cast shadows.
- Easy monitoring: Microinverters provide real-time monitoring of the performance of each individual solar panel in a system. This allows for easier detection of any problems or issues with the system and allows for quicker maintenance and repairs. And with Hoymiles, you can monitor them using cheap opensource hardware (Ahoy DTU)
- Ease of installation: no modification of your current electrical installation
- And use them to re-inject current during the night ;) by simulating a solar pannel with a battery
In these times when everyone is paying attention to their electricity bill, it can be noted that with a micro-inverter system, there is no need to modify your electrical installation. So you can install them even if you are a tenant of your apartment! This explains the craze for solar kits that can be installed by anyone, sold by Lidl, Beem, Sunology and others, which are all based on micro-inverters.
Another super useful feature of Hoymiles microinverters:
- With Ahoy DTU or the official DTU, you can limit the power production ☺
DIY Night injection of solar electricity
The energy we have stored during peak production times, will be now reinjected into the grid during the night time when you have an undersupply of solar energy. If we do it right, our energy usage will be close to Zero during the night.
How to size the system? For this you'll need to know exactly what is your energy usage during the night.
In my case, my power usage is between 60w and 140w with an average of 100w, so:
- any inverter with more that 140w will do, I chose the Hoymiles HM-350 with its 350w peak production power
- the battery capacity can be 12 hours * 100w = 1200wH capacity. If you want to cover long winter nights, maybe 1600wH is better.
One small problem: a classic LFP battery operates at 12.8 volts and our inverter needs at least 22 volts to start. We will need a 12-24v boost converter, or a 24 volts battery. I decided to start with a 12.8v LFP battery and upgrade later to 2 batteries. So I will need the most efficient 12-24v DC converter possible.
Here are the converters I have test or test soon:
- Aliexpress LTC3780 adjustable boost converter: when the output voltage is set to 28v, I've got ~90% efficiency, but the power is limited to 50w-60w. Did not manage to get the advertised 80w, and some components run very hot, so it's not a good idea to go above 60w.
- Aliexpress 10 Amps aluminium 12-24v converter: works great! Efficiency seems to be around 95%
- Aliexpress 400w variable boost converter: already tested extensively on some Youtube channels.
Soon the full explanation! Stay tuned 😊 ==> 3 years later... Full Description of the 2026 upgraded version


Speak your mind: